
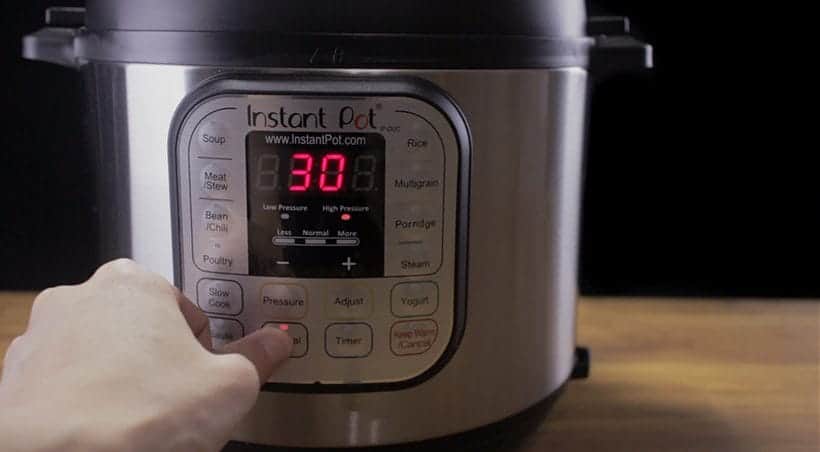
If you can use only 1 button on the Instant Pot, it’ll be the Manual Button.
Most of the recipes online are developed using the Manual Button, because it gives us control to cook precisely and accurately.
If a recipe states “Cook at High Pressure for 10 minutes”: press the Manual button and change the cooking time to 10 minutes by pressing “-” button or “+” button.
2. Quick Release (QR) vs. Natural Release (NR)
2 most common ways to release pressure in Instant Pot: Quick Release & Natural Release.
a) Quick Release: quickly releases the inner pressure. Great for quickly stopping the cooking process to prevent overcooking the food. Ideal for quick-cooking vegetables & delicate seafood.
b) Natural Release: allows the pressure to be released gradually. Great for foamy food, food with large liquid volume or high starch content (e.g Soup, Porridge, Congee).
Watch the Demo Video on How to Release Pressure:
Read More: Natural Release vs. Quick Release
3.1. Aim for One Cup of Liquid
As a new user, it is best to aim for one cup of total liquid when pressure cooking meat. Too much liquid will dilute the flavor and add the “going up to pressure” time and pressure release time.
*Instant Pot recommends using at least 1 1/2 cup of liquid, but it is totally safe with 1 cup of liquid.
Please follow recipes for food such as beans or grains that absorb lots of water.
3.2. Thick Liquid Generates Less Steam
Thin the Liquid: If the pressure cooking liquid is too thick, Instant Pot may not be able to reach the desired pressure to start the pressure cooking cycle. Consider thinning out the liquid by adding chicken stock or water.
Add Thickeners After Pressure Cooking Cycle: Unless a trusted recipe indicates otherwise, always add thickeners such as flour, cornstarch, potato starch, arrowroot after the pressure cooking cycle.
4. How to Brown Meat & Deglaze
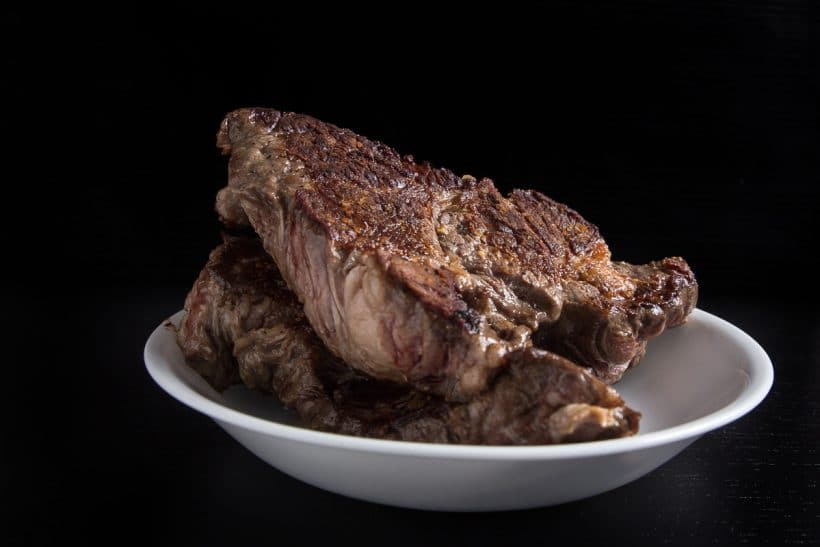
Brown Meat: when possible, always brown meat using Saute Function (Press Saute Button) or Saute More Function (Press Saute Button and Adjust Button Once). Maillard reaction adds lots of flavor to the dish.
Deglaze: pour cold liquid into a hot pot, then scrub the brown bits off the bottom. These brown bits are very flavorful.
5. Never Force Open the Instant Pot
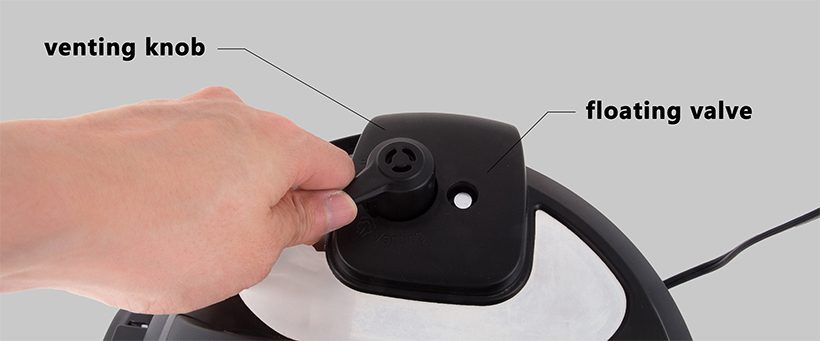
Always make sure pressure has been fully released before attempting to open the Instant Pot.
Once all the pressure has released from the pot, the floating valve will drop.
Once all the pressure has released from the pot, the floating valve will drop.
Always turn venting knob to venting position to ensure all the pressure has been released.
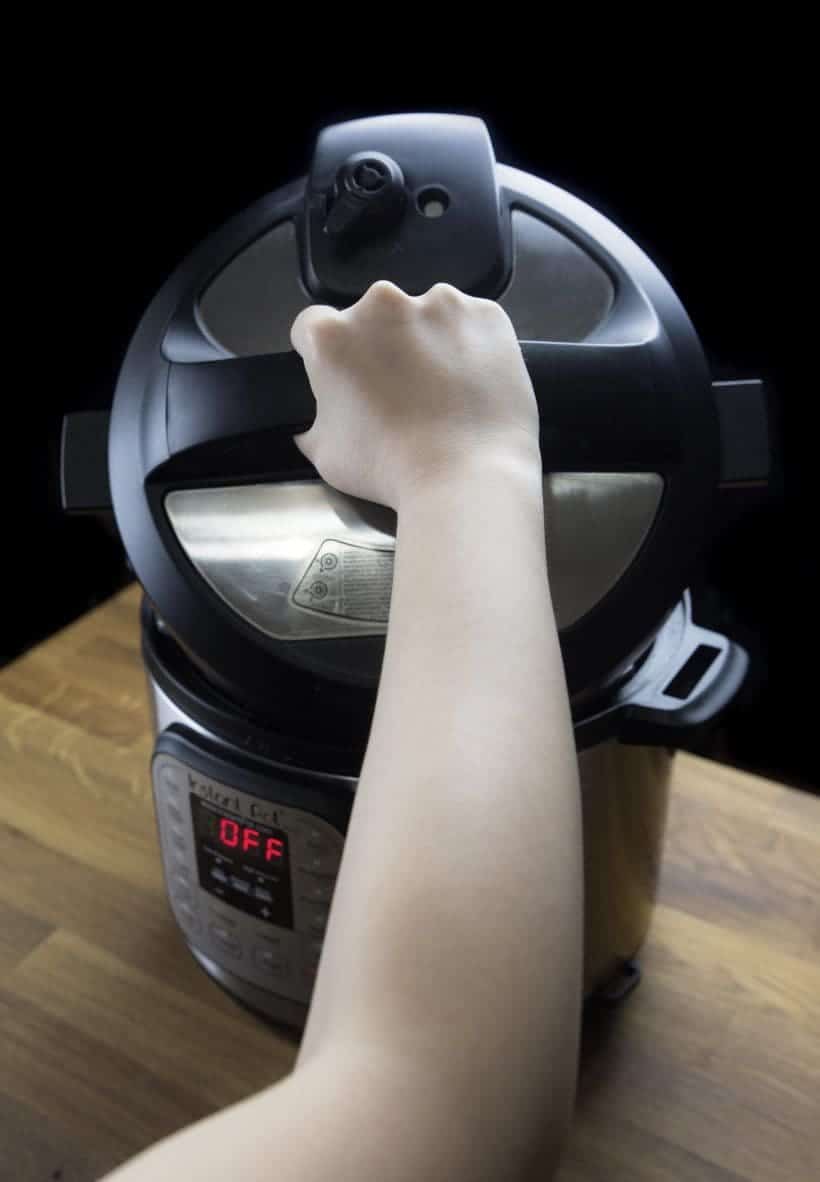
6. Safest Way to Open the Lid
The safest way to open the lid is to slowly tilt it away from you. The lid acts as a guide to direct the steam away from you. Accidents do happen in kitchen. In extremely rare situation (user error), the lid also acts as a shield to protect you.
7. How to Double the Recipes
For most dishes, you do not need to increase the cooking time when doubling a recipe.
Please keep this Important Safeguard in mind when doubling a recipe:
Do Not Overfill – Overfilling may clog the Pressure Release Valve and develop excess pressure.
- All Pressure Cooking Programs: Do not fill the unit over 2/3 full.
- For Food that Expands During Cooking (i.e. grains, beans, and dried vegetables): Do not fill the unit over 1/2 full.
From page 3 of the Instant Pot DUO60 manual.
8. Pot-in-Pot (PIP): What & How?
Pot-in-Pot = 2 in 1 (2 dishes in 1 pot)
The Pot-in-Pot method allows you to cook 2 dishes separately in Instant Pot at the same time.
Example: You can cook chicken thighs at the bottom of the pot, and a bowl of rice on top with a steamer rack lifting it up (separating it from the chicken).
This takes One Pot Meal to a whole new level 🙂
See Pot-in-Pot in Action with This Recipe Video:
Full Recipe: Pressure Cooker Teriyaki Chicken and Rice
9. Adjust the Cooking Time At High Altitude
Our pressure cooker recipes are developed and tested at close to sea level.
So, if you live in a high altitude city (over 3000 ft above sea level), remember to adjust your cooking times according to this Pressure Cooker High Altitude Cooking Time Adjustment Chart:
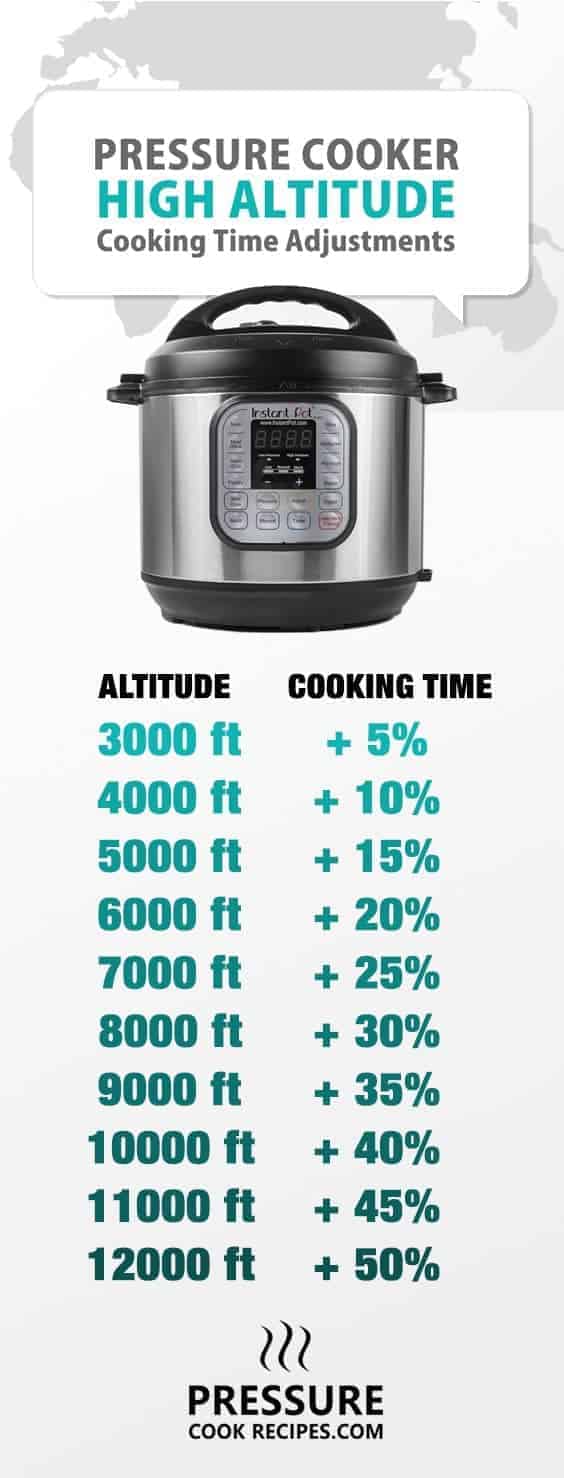
Read More: High Altitude Cooking Time Adjustments
10. Always Check the Sealing Ring

Instant Pot recommends replacing the Silicone Sealing Ring every 18 – 24 months or when you notice deformations.
Read More: Instant Pot Safety Tips
BONUS: Must-Have Instant Pot Accessories
Here are 3 “Must-Have” Instant Pot Accessories We Use Daily:
1. Extra Silicone Sealing Rings
- Silicone Sealing Ring – Instant Pot Sealing Rings’ life expectancy varies. If steam starts to leak around the lid, replace the Instant Pot Sealing Ring immediately.
- Genuine Sweet & Savory Edition Silicone Sealing Ring – Two Pack – Since the sealing ring will absorb the smell of the food in the pot, many users also like to use separate sealing rings for cooking savory dishes and desserts.
2. Steamer Racks
- Stainless Steel Steaming Rack Stand 5″ Diameter – this is the most commonly used accessory for cooking in Instant Pot. A must for using the Pot-In-Pot method!
- Stainless Steel Steamer Basket – Another steamer basket we use frequently (i.e. ribs!)
3. Containers – any oven-safe containers will be safe to use in the Instant Pot (i.e. Stainless Steel, Silicone, Corelle bowls)
Want More? Check out the most raved accessories among other Instant Pot users: Instant Pot Accessories
Use the Manual Button
 Reviewed by Unknown
on
junio 22, 2017
Rating:
Reviewed by Unknown
on
junio 22, 2017
Rating:
Reviewed by Unknown
on
junio 22, 2017
Rating:

")


No hay comentarios: